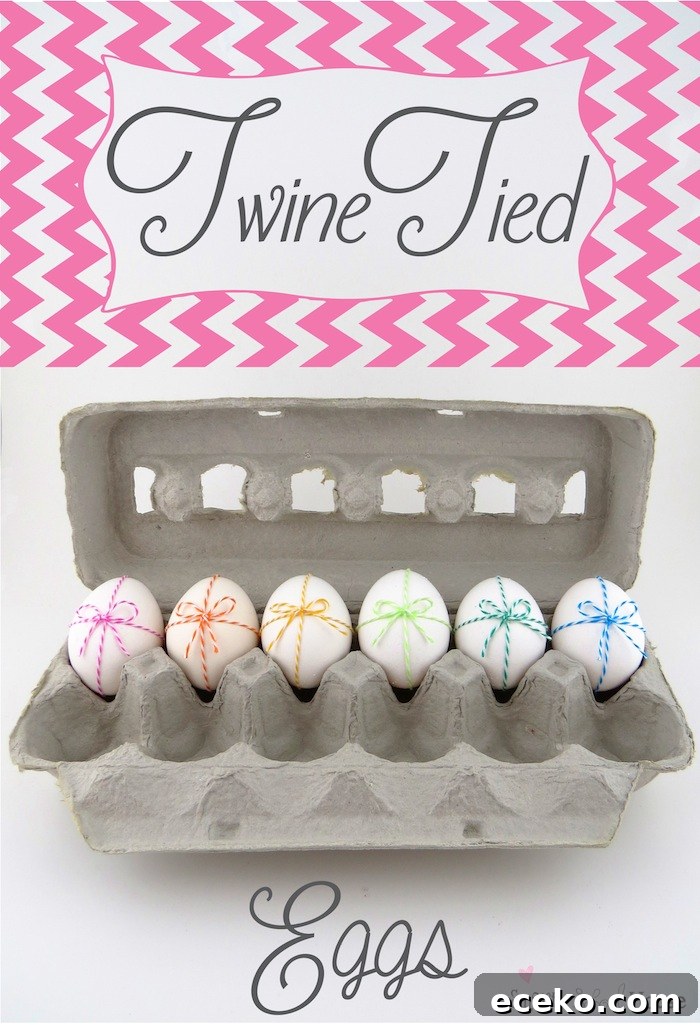
Twine Tied Easter Eggs
Ready to decorate some eggs? Bring a fresh, handmade touch to your Easter table with this simple and charming craft. Using basic supplies like Baker’s Twine and hard‑boiled eggs, you can create an elegant, rustic look in minutes. This quick DIY is perfect for families, classroom activities, or anyone who enjoys seasonal decorating. Below you’ll find clear, step‑by‑step instructions, helpful tips, and styling ideas to make a beautiful display.
This project highlights the simple beauty of Baker’s Twine wrapped around natural eggs. It combines a minimalist aesthetic with playful color—ideal for modern or farmhouse‑style Easter décor. The technique is quick enough for a last‑minute craft and safe for children when using hard‑boiled eggs. You can vary colors and textures of twine to match your holiday palette, from soft pastels to bold stripes.
The materials you need are minimal and inexpensive:
– Hard‑boiled eggs (white or brown)
– Baker’s Twine in your chosen colors
– Scissors
– Optional: small removable bows, glue dots, or tiny embellishments for added detail
– Optional: an egg carton, decorative tray, or moss for display
– Hard‑boiled eggs (white or brown)
– Baker’s Twine in your chosen colors
– Scissors
– Optional: small removable bows, glue dots, or tiny embellishments for added detail
– Optional: an egg carton, decorative tray, or moss for display
Step‑by‑Step Instructions
Step 1: Prepare the eggs
Begin by hard‑boiling your eggs and allowing them to cool completely. Pat them dry so the twine sits neatly against the shell. If you prefer to keep the eggs edible after decorating, be gentle when handling and avoid adhesives that contact the shell directly.
Begin by hard‑boiling your eggs and allowing them to cool completely. Pat them dry so the twine sits neatly against the shell. If you prefer to keep the eggs edible after decorating, be gentle when handling and avoid adhesives that contact the shell directly.
Step 2: Wrap the first piece of twine
Measure a length of Baker’s Twine long enough to wrap around the egg horizontally. Hold the twine about halfway down the egg and cross the ends beneath it. Bring the ends back up and tie a secure knot on top, keeping the twine snug but not so tight that it cracks the shell.
Measure a length of Baker’s Twine long enough to wrap around the egg horizontally. Hold the twine about halfway down the egg and cross the ends beneath it. Bring the ends back up and tie a secure knot on top, keeping the twine snug but not so tight that it cracks the shell.
Step 3: Add a vertical twine band
Take a second length of twine and wrap it vertically around the egg so it crosses the first band at a right angle. Tie this band into a knot or a small bow at the top. The intersection gives the egg a gift‑wrapped look and adds visual interest.
Take a second length of twine and wrap it vertically around the egg so it crosses the first band at a right angle. Tie this band into a knot or a small bow at the top. The intersection gives the egg a gift‑wrapped look and adds visual interest.
Step 4: Finish with a bow or embellishment
Create a tiny bow with a short piece of twine and attach it where the bands meet. For a decorative touch, add a small fabric or paper bow, a dried flower, or a glue dot charm. If you intend to keep the eggs edible, use removable embellishments that won’t contaminate the shell.
Create a tiny bow with a short piece of twine and attach it where the bands meet. For a decorative touch, add a small fabric or paper bow, a dried flower, or a glue dot charm. If you intend to keep the eggs edible, use removable embellishments that won’t contaminate the shell.
Styling and display ideas
Present your twine‑tied eggs in a reused egg carton for a rustic look, or nestle them on a bed of fresh moss in a shallow wooden tray for an organic centerpiece. Mix and match twine colors to create coordinating groups—pastel twines look lovely together, while a single bold color makes a striking modern statement. You can also alternate twine patterns and textures, such as thin baker’s twine with a thicker jute strand for contrast.
Variations and tips
– Use dyed eggs for a colorful base under the twine; the contrast between the dyed shell and natural twine is striking.
– If working with children, pre‑cut twine lengths and supervise tying to avoid pressure that might crack the eggs.
– For a long‑lasting keepsake, consider crafting with wooden or plastic eggs instead of real ones; the twine technique is identical.
– Try knotting several thin strands together before wrapping to create a striped twine effect.
– If working with children, pre‑cut twine lengths and supervise tying to avoid pressure that might crack the eggs.
– For a long‑lasting keepsake, consider crafting with wooden or plastic eggs instead of real ones; the twine technique is identical.
– Try knotting several thin strands together before wrapping to create a striped twine effect.
Why this craft works for Easter
This twine‑tied egg project is versatile, affordable, and fast. It captures the handmade charm of Easter while allowing for creative personalization. Whether you’re crafting with kids, preparing seasonal decorations, or staging a holiday photo shoot, these twine‑wrapped eggs add a delicate, handcrafted accent that suits many decorating styles.
More seasonal inspiration and simple DIY ideas can help you create a beautiful spring display—try pairing these eggs with fresh florals, painted wooden accents, or recycled packaging for an eco‑friendly approach.